Saturday, February 28, 2015

One sheet card template

I came across in Pinterest the template using an a4 size paper to construct these cards. The cut off pieces put together will easily make a set of 6 stunning card. This is also an easy way to create card sets for presents or for the market. 


I'm so empressed how easy it is to make  this  set.

Tuesday, February 24, 2015

Poppies garden

I started it today using poppies stamp, and I just can't put the stamp down. So with the theme of landscaped flower bed in mind, I combined part of the flower bunch from painted petals with the poppies. I'm happy how this combination turned out, The receiver of this card is sure to appreciate this. 

Poppies in a terraced design

The concept and idea that I explored yesterday was again expanded today. I thought maybe if the card stock is layered it might give the depth of the landscape I have been aiming for. So I have come up with this card:


I am happy how the layering worked in this design.

Monday, February 23, 2015

Roolly landscape card

I just had a vision of terraced landscape of flower beds and so I just had to quickly put this into a card. The first version was using a row of trees as a. Background and then I added in two rows of flowers using the painted petals stamp set from Stampin' Up!. So here is its.


I could definitely improved this.
So here I am back to the drawing board. I am still keeping the terraced flower bed idea but this time I'm using fern as the background feature. So here it is.


I think each is its own composition and I'm definitely happy have both as an original idea. Watch the space as I will be creating a different version of the terraced bed card design.

Sunday, February 15, 2015

Invitation card and thank you card set

It is always great to get and invite and receive a matching thank you card after. So the challenge is how to make the two cards compliment with each other. 
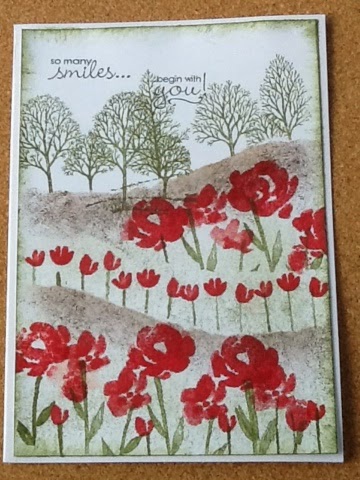
I decided to use the painted petal set at it is a versatile stamp set that will enable me to compose a design that can be simplified or embellished to show the flow in the two cards. 
The envelop for the thank you was constructed using the envelop punch board while the envelop for the invitation book marker was made using the traditional envelop with template.  And to make the set more special, I decided to make a box to hold the 2 sets of card as one set. The set contains six invitations with envelops and six thank you cards with envelop.


If interested to get your hands in this set, I accept commissioned work to your required design with a free consultation to tease out your ideas out.
Contact me through my RCH Creation Facebook Pages link.

Day of recognition

I just have to share this... This might be so late but having done a screen shot I can share to everybody who visits my blog the recognition on my design. I am so ecstatic having my design recognised by many members of Stampin' Up! Network putting it as rank 2 on the Leaderboard of the samples in February 5. Also the process of manning put the design to rank 4 on the leaderboard on the content for discussion. So what does this design look like? 
Here it is: 

 
I hope this is just one of my best creations ..... Wanting to learn how to make it attend my class.


Thursday, February 5, 2015

More framed and sealable card

Every time I find success in the creation of a project, I always make another follow up production of a similar project to enable me to fine tune some of the fiddly and tedious process. 
So the card is the project 2 of the framed and sealable card.

Framed and sealable card

I have been busy designing various bits and pieces namely valentines packaging and card sets and packaging. While busy making up card sets packaged for the market the idea of a famed card is always close in heart. So while I have made framed cards before the requirement to have packed in a box has been a challenge. Changing the card size and making different packaging for sweet treats, the idea of having framed card position in the middle of the cardstock and the side flaps provided me the concept of the framed and sealable card. Having made framed card in cations sizes I have managed to get the dimensions that provide me the most efficient and effective utilisation of the card stock with minimal wastage.
One piece 12 x 12 card stock required in making the base and the frame in the card. Additional card stock is used as the need of panel layering is required in the completion of the card design. The frame is raised by 5/8 of an inch and all around width of the frame is 3/4 of an inch. The framed card dimension is 6 x 5 1/2 of an inch. 


The finished project has been a delight. I have definitely cracked the delicate process of making this special design.